Monday, January 31, 2011

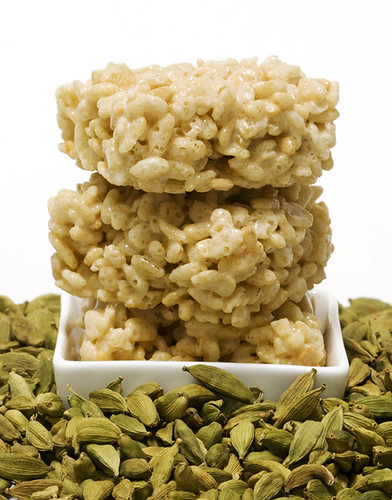
Orange Blossom Cardamom Rice Krispie Treats

I didn't do very well last week on the healthy eating/exercise front. After a few grueling back-to-back deadlines to help save one of my favorite, and most dearly missed co-workers from back home (miss you Tif!), I was left with little time or energy to do anything other than just sleep. I didn't cook. I didn't clean. You know I'm telling the truth when I didn't even have the energy to go to the grocery store to buy food. 

I snacked on salt & vinegar chips, had days where I only ate one "real" meal, and didn't do my yoga. To make matters worse, I topped the weekend off with few too many pints of beer as we celebrated our friend Jules' birthday. For his present, I just kept on the same course that I'd been on that entire week... I needed to return a pie plate he left at our place so what better to do than fill it with something yummy for his birthday! A Rice Krispie treat "pie" with dark chocolate espresso ganache :)

Jules' Birthday Present
  Photo by Quentin Isackson

I'm giving Quentin all the credit for this one; it was his idea to do the yin & yang, I just executed it.

Speaking of Rice Krispie treats, about a year and a half ago, I started an Etsy shop selling none other than, you guessed it - Rice Krispie treats. Not just your normal everyday Rice Krispie treats (but who doesn't love those?). I made flavors like; Pineapple Coconut, Dark Chocolate Ginger, Lemon Cranberry, Vietnamese Coffee... you get the picture. They're not the healthiest treats, but they sure are delicious!

Now closed, the shop had a pretty good little run, especially with the help of my friends and family (thanks guys!), but I don't think the treats would ship across the Atlantic without getting a little soggy - if you get my drift. So you know what? I'm going to post a few of the recipes here, so that whoever wants to make them can enjoy. 

I was already bad this past week... what's one more sweet treat going to hurt? 

Orange Blossom Cardamom Rice Krispie Treats

The combination of floral orange blossom and aromatic green cardamom give these treats their unique character. Sweet, with a subtle hint of citrus. You can substitute any kind of puffed rice cereal for this recipe, but the Rice Krispies brand is the best in my opinion. And since Quentin's parent's gave me a box of Rice Krispies for Christmas, it's about time to put them to good use!

Orange Blossom Cardamom Rice Krispie Treats

3 tablespoons butter
10 oz marshmallows
6 cups Rice Krispies cereal (you can substitute any kind of puffed rice cereal)
2 teaspoons ground cardamom
1 teaspoon orange blossom extract
1 teaspoon vanilla extract


In a large non-stick pot, melt the butter over low heat. Once the butter is melted, add the marshmallows and turn the heat up to medium-low. Stir occasionally to make sure the marshmallows melt evenly. Once all of the marshmallows are melted, add the ground cardamom, orange blossom and vanilla extracts, and stir to combine.

Remove from the heat and stir in the Rice Krispies cereal until completely coated with the marshmallow mixture. Transfer to a greased 9" x 13" (or similar) baking dish and smooth out with the back of a greased spatula or spoon.

Let cool and then cut into squares. Serves about 12... depending on the size of your squares. :)

After this - It's back to good-for-you food!

Sunday, January 23, 2011

KCC Challenge: Champorado

For those of you who haven't read my Chocolate Polvoron post, I suppose I'll need to give you a little explanation as to the title of this blog entry.

A few months ago, I stumbled upon the Kulinarya Cooking Club - hence, the "KCC".  It was started by a group of Filipino foodies living in Sydney, who were passionate about the Filipino culture and cuisine. Since then, the group has expanded outside of Australia, and now has members from all over the world (one of them being me). Each month KCC showcases a new dish along with our family recipes. By sharing these recipes, we hope you find the same passion and love for Filipino food as we do.

This month, it was Jen (from Jen at Work), Maribel (from FoodGeek's Diary), and Tressa's turn to choose a theme/challenge. Here's the challenge they came up with for this month:

"What Filipino dish (savory or sweet) would you like to have on your birthday?"

This challenge was a bit of a no-brainer for me. I only had to narrow it down between 3 dishes; Chicken Adobo, Pancit Palabok, and Champorado. I already posted my Chicken Adobo recipe, so that narrowed it down to two. I didn't have all the ingredients for Pancit Palabok, an intensely flavored noodle dish with garlic, crab, fish sauce, shrimp, hard boiled egg, green onions, chicharon, calamansi (ha... just to name a few ingredients)... so that I'll save for another day. This worked out in my favor, since Champorado, Filipino chocolate rice pudding, was the most "Birthday-esque" anyways. (you know, since there's chocolate in it).. so Champorado it is!

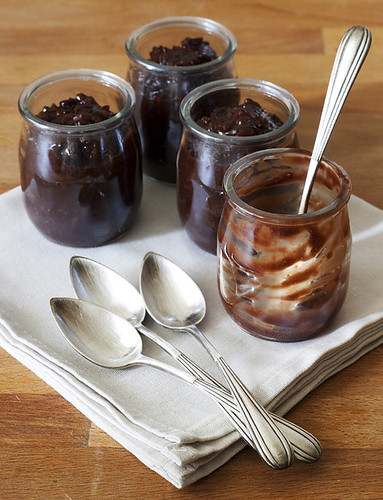
Champorado

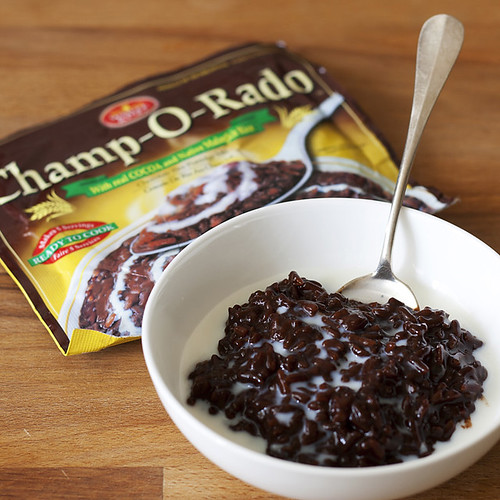
If today were really my birthday, this would be my birthday breakfast. Champorado is Filipino chocolate rice pudding/porridge, made with glutinous, or "sticky" rice, sugar, cocoa powder, and vanilla. It's eaten similarly to the way you eat oatmeal, with a little milk or cream (or even sweetened condensed milk) swirled on top.

Now, for my past roomates and family members, you either already know or have been subject to my slight obsession with Champorado. Usually, it comes in pre-measured packets, and all you have to do is add water and cook it until it's ready. So simple. So dangerous. I would sometimes find myself making a huge batch, and then would eventually have to force it on my friends and roommates so I didn't have to eat it all (not that I didn't want to... hehe). Every time my Lola came to the States to visit, I would beg her to pack a few packets of Champorado mix in her suitcase for me.

*I actually still have one packet (which I brought with me from the States) just in case I had the sudden "Champorado" craving. *

But, since I'm likely to not be able to find those lovely little Champorado packets anywhere here in Paris, I placed my "emergency" packet back in the cabinet (until I really need it) and learned to make it from scratch. I searched a few websites to get an idea of how to make it, and then adapted it to my own taste. Turns out, making Champorado from scratch makes for a much creamier, more chocolate-y and velvety texture... much richer than the pre-measured packets... I'm not hating on the packets though... I still love them! 

Champorado

Champorado

1 cup glutinous or sweet rice
3 cups water
1/3 cup unsweetened cocoa powder
1/2 cup granulated sugar
1/2 teaspoon vanilla extract 
pinch of salt

Add rice and water to a medium sized saucepan and bring to a boil. Once boiling, turn the heat down and simmer until the rice is fully cooked, stirring occasionally so the rice doesn't stick to the bottom of the saucepan.

Once the rice is fully cooked, add the cocoa powder, sugar, and vanilla, pinch of salt, and stir to combine.

Serve hot or cold... with milk, cream, or sweetened condensed milk drizzled over top. Serves 4-6.


Kulinarya Cooking Club Members:

Kath – http://www.acupcakeortwo.com/
Trisha – http://sugarlace.com/
Trissa – http://trissalicious.com/
Olive – http://www.latestrecipes.net/
Caroline – http://whenadobometfeijoada.blogspot.com/
Ninette – http://bigboldbeautifulfood.blogspot.com/
Peach- http://www.thepeachkitchen.com/
Althea- http://www.busogsarap.com/
Asha – http://forkspoonnknife.blogspot.com/
Malou – http://www.skiptomalou.net/
Cherrie – http://www.sweetcherriepie.com
Acdee – http://acdee.blogspot.com/
Valerie – http://www.acanadianfoodie.com/
Sheryl – http://crispywaffle.com/
Divina – http://www.sense-serendipity.com/
Anna – http://www.anniesfoodjournal.blogspot.com/
Dahlia – http://www.energychef.blogspot.com/
Joy – http://joyjoycreativeoutlet.blogspot.com/
Maribel – http://www.foodgeek.webs.com/
Tressa
Jen – http://www.jen-at-work.blogspot.com/
Pia – http://bisayajudkaayo.blogspot.com/
Malaka – http://thegrandinternational.com.
Mimi – http://lapinchecocinera.blogspot.com
Erika – http://ivoryhut.com/
Kat – http://twitter.com/alanokat
Lala – http://thislittlepiggywenttothemarket.blogspot.com/
Selfie – http://eats.sefiebee.com/
Connie Veneracion - http://homecookingrocks.com/
Oggi - http://oggi-icandothat.blogspot.com/
Katrina - http://lardonmyfrench.blogspot.com/
Rochelle - http://www.whydiss.blogspot.com/
Marica – http://cuppycreme.blogspot.com
Diona – http://titaflips.blogspot.com/
Rowena - http://saraplicious.blogspot.com
Theodore – http://chefbyday.wordpress.com/
Gianna – http://the-empty-fridge.blogspot.com/
Mireille – http://dirtyicecreaminyourlunchbox.blogspot.com/
Marishka – http://rishka.multiply.com/
Annapet – http://moonglowgardens.wordpress.com/
Boyet – http://reelandgrill.blogspot.com/
Adora – http://adorasbox.net
Yaz – http://whoatemytomato.wordpress.com
Marvin – http://www.eatmarvin.com

Tuesday, January 18, 2011

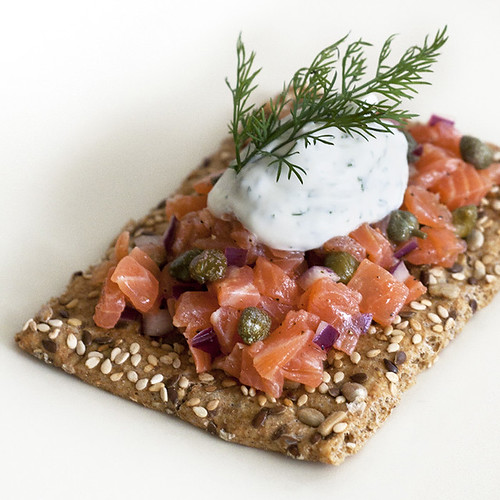
Tartine Tuesday: Smoked Salmon Tartare-tines

Tartar-tine Tuesday: Smoked Salmon Tartines

This is a quick one, just wanted to plug in my lunch before I got back to the daily grind! Bon app' :)

Smoked Salmon Tartare-tines

4 large multi-grain crackers
2-3 slices of smoked salmon, diced
4 teaspoons red onion, minced
4 teaspoons capers
4 teaspoons extra virgin olive oil
2 teaspoons lemon juice
4 tablespoons crème fraîche
2 teaspoons fresh dill, chopped
1/4 teaspoon ground coriander (if you can freshly grind whole coriander seeds, this is better)
1/4 teaspoon lemon zest
fresh dill sprigs, for garnish
salt and pepper, to taste


In a small bowl, combine the smoked salmon, red onion, capers, olive oil, and lemon juice and mix thoroughly. Season with freshly ground black pepper, to taste. Let sit for about 5 minutes to let the flavors meld together.

Combine the sour cream, dill, ground coriander, and lemon zest in a small bowl and mix thoroughly. Salt to taste.

Top each cracker with smoked salmon tartare and top with a dollop of the crème fraîche mixture. Top with a few fresh sprigs of dill. Serves 2-4.

Tuesday, January 11, 2011

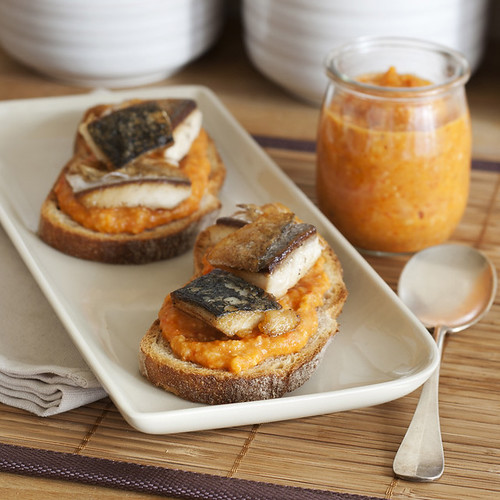
Tartine Tuesday: Pan Seared Mackerel & Romesco Tartines

I'm doing pretty well so far with my 2011 resolutions. I woke up this morning and knocked out my yoga routine, and am weening myself off of soda and pasta with sweet, crunchy, fresh-from-the-market carrots.

Sweet Market Carrots

I'm more than 3/4 of the way through David Lebovitz's The Sweet Life in Paris, which literally makes me laugh out loud, because I swear I'm walking in his footsteps. Book 1 of (at least) 5 almost done!

Continuing on my resolution train, I thought long and hard about today's tartines. My dad has been tossing the idea of doing a "red pepper" related tartine almost every time I talk with him, so these tartines kill a few birds (and resolutions) with one stone.

Pan Seared Mackerel & Romesco Tartines

For my resolution to eat more sustainably, I'm using Spanish mackerel in today's tartine. It is a fish which matures quickly and produces high numbers of offspring, which makes it one of the best choices when it comes to ocean-friendly eating. As an added bonus, it's also fairly inexpensive (about 9 Euros/kilo... about 5 Dollars/pound).

This tartine also test my skills at cooking outside of my comfort zone. Since I'm now a lot closer (literally) to different cuisines, I figured I would start cooking a few things I've never cooked before. Giving a nod to my Dad's request to make a red pepper tartine, I paired the mackerel with romesco, a sauce originating from Catalonia, Spain, which consists of sweet roasted red peppers, tomatoes, garlic, and a few other goodies.

Pan Seared Mackerel & Romesco Tartines

12 slices of rustic bread or sourdough, toasted
8 mackerel fillets, skin-on and deboned
1 tablespoon canola or vegetable oil
salt and pepper, to taste


Cut each mackerel fillet into two pieces, removing the reddish/brown blood line down the center of the fillet (where the backbone lies) as this part of the fish can be very strong flavored. Cut the fillets into small 1 inch pieces. Season with salt and pepper. 

Heat oil in a medium sized non-stick frying pan over medium-high heat. Carefully add the pieces of mackerel, skin-side down and press gently on the fish with the backside of a spatula, which ensures a crispy skin. After about 2 minutes, flip the pieces of fish and cook for another 2 minutes, or until cooked through. Transfer to a plate once cooked.


Romesco Sauce:

6 roma or plum tomatoes, core removed and quartered
1 red bell pepper, quartered
12 cloves of garlic
2/3 cup extra virgin olive oil
1-2 slices of bread (depending on the size of your bread)
1/2 cup toasted whole almonds
1/3 cup red wine vinegar
1/2 teaspoon Spanish paprika
1 pinch crushed red pepper flakes, to taste
salt, to taste


Preheat an oven to 425° Fahrenheit (220° Celsius). Line a baking sheet with aluminum foil.

Place the tomatoes, bell pepper, and garlic cloves onto the prepared baking sheet. Brush the vegetables with some of the olive oil, then sprinkle with kosher salt. Bake in the preheated oven until the garlic has turned golden brown, 15 to 20 minutes. Remove from the oven, and allow to cool for 10 minutes. 

While the vegetables are cooling, bake the bread slice on one of the oven racks until golden brown. Remove and allow to cool.

Add the vegetables and any juices from the pan into a food processor or blender. Break the bread into pieces, and add to the food processor along with the toasted almonds, vinegar, paprika, and red pepper flakes. Puree until finely ground, then drizzle in the remaining olive oil with the machine running. Salt to taste. 
 
Spread romesco sauce over each slice of toasted bread and top with a few pieces of mackerel. Serves 4-6.

Thursday, January 6, 2011

Chocolate Polvoron

This year, I am making it one of my top goals to cook more Filipino food. Being a half-Filipino/half-American raised in the States, the only Filipino dish I really know how to cook by heart is Chicken Adobo. Sorry, Momma. This March, my Mom is planning a big trip to the Philippines for the whole family, so I figured I should start learning a thing or two about my other half's culture. Besides learning how to count to ten in Tagalog (I know, I'm such a bad Filipina), I'm focusing my energy on learning a bit about Filipino cuisine.

A few months ago, I stumbled upon the Kulinarya Cooking Club. It was started by a group of Filipino foodies living in Sydney, who were passionate about the Filipino culture and cuisine. Since then, the group has expanded outside of Australia, and now has members from all over the world (one of them being me). Each month KCC showcases a new dish along with our family recipes. By sharing these recipes, we hope you find the same passion and love for Filipino food as we do.

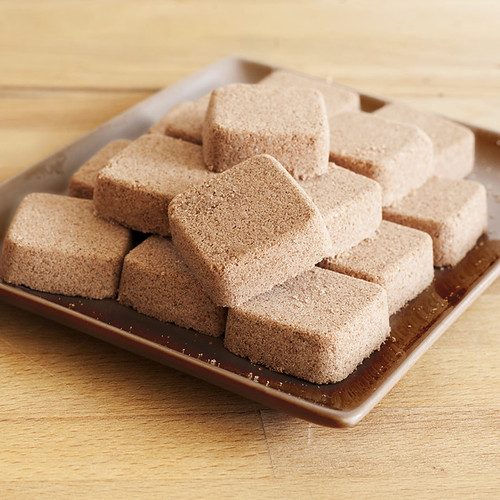
Chocolate Polvoron

I'm a little late with December's KCC theme: Christmas Food Gifts. Whoops. I was so excited, because I knew exactly what I was planning to make. Polvoron, Filipino powdered milk candy. I even made them before Christmas, and put them in a box to harden in the freezer. But with all the hustle and bustle of work/holidays/parties/festivities, my blog froze a little bit as well. So this isn't technically my KCC post of the month, just another Filipino recipe to add to my repertoire.

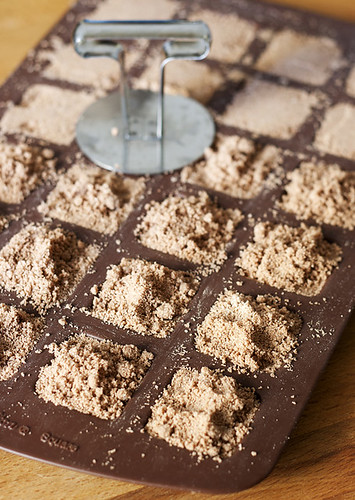
Pressing the Polvoron

I remember having boxes full of the little cellophane-wrapped polvoron in the freezer around Christmas time... which always seemed to disappear at the hands of my little brother. I didn't care too much for them when I was young, but as with many things I didn't like when I was a kid, I figured I'd test to see if polvoron made the switch. I was sure if I added cocoa powder to make them chocolate flavored, I wouldn't be disappointed.

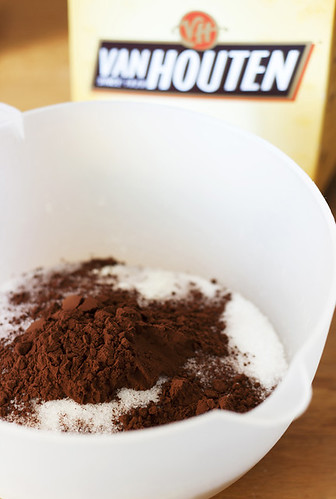
Cocoa Powder

Chocolate Polvoron

1 cup flour
1 cup powdered milk
1/2 cup white sugar
4 teaspoons cocoa powder
3 ounces melted butter
a pinch of salt


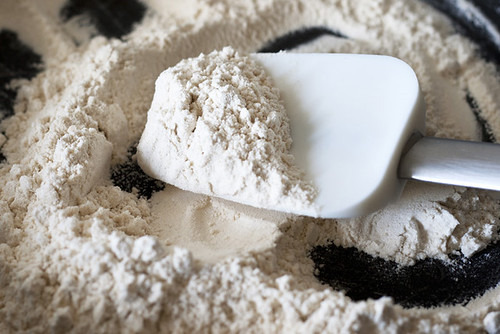
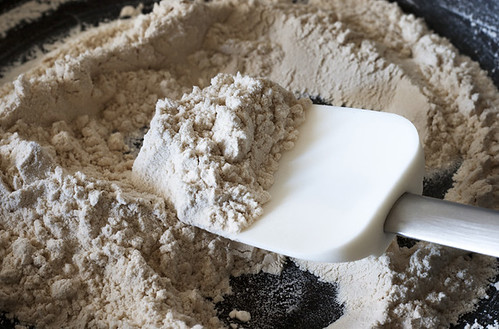
In a small sauce pan or skillet, toast the flour over medium-low heat. Stir continuously to avoid burning. When the color of the flour turns beige, turn off the heat. 

Not Toasted Yet...

Now It's Toasted!

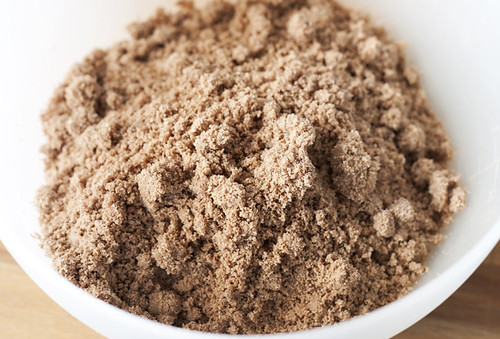
Cool the flour for 10 minutes then sift it, with the pinch of salt, into a large mixing bowl. Sift the sugar and powdered milk together in another mixing bowl. Combine all the sifted ingredients and stir well. Pour in the melted butter. Mix well to combine.

Polvoron Mix

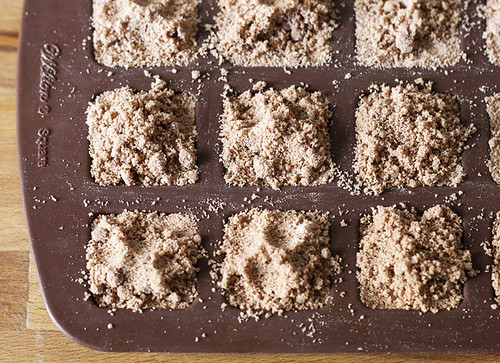
*Traditionally, polvoron are pressed with a "polvoron mold", which can be difficult to find outside of the Philippines. Since I didn't have a "polvoron mold" I used bite-sized brownie mold.

Pre-Pressed

Fill the molds with the flour/powdered milk/sugar/cocoa mixture. Press the mixture firmly into the molds using the back of a spoon, your fingers, or anything flat (I used a ring mold press). Release the polvoron and stack them in an airtight freezer container.

*I found it easier to release them from the silicone mold if I chill them in the freezer for an hour or so beforehand.*

Chill in the refrigerator or freezer for a few hours or until firm. Yields 24.

Once they are chilled, you can wrap them in pieces of cellophane paper. I figured I would be a little "greener" and just eat them straight from the container...